
1. Getting Started
basic workspace & viewport setup
Author: bac9-flcl
Author: bac9-flcl
For this and all the following tutorials I am going to assume you have the latest version of Sketchup 8.0 (not necessarily in Pro edition) in English, and (in case you're intending to use SU for CryEngine-oriented modeling) PlayUp plug-in installed (you can find the installation tutorial on the official PlayUp site).
1.1. Toolbars
The first thing we're going to check is your workspace setup, toolbars in particular. By default your SU interface looks like that:
")
")
This is "Getting Started" toolset. Unfortunately, and despite our tutorial title, the tool selection there is insufficient for any serious work. Let's configure the workspace properly. Most importantly, you need to disable the "Getting Started" and enable the "Large Tool Set". I'd also recommend to enable "Views" and "Sandbox" (this one is not anyhow related to CryEngine) panels, these might get handy later. Here's my setup.
")
Remember that you can drag and place the panels as you like, and also resize them, changing the row count. On a widescreen display, I'd recommend to place all the tools as 2-column side panel.
1.2. Template
The next thing it's good to check is the template. Basically, the template is a model containing the empty scene and all of the precision, dimensional, unit and style parameters. This model is loaded every time you hit the "New" button.
I am going to assume you'll be working with the metric system of measurement, but, of course, it's possible to configure unit setup for feet/inches.
When you launch SketchUp for the first time, you're prompted to select a template. We're usually selecting "Simple" one, which is basically good.
")
Apart from the fact that it contains several things we'll never need, e.g. these 8 materials and SketchUp developer Susan. I suppose you don't want to waste your time on deleting these materials and component every time you create a new model. And also that color setup which is not easy on eyes if you're going to spend hours there.
Instead of wasting our time with detailed instructions on style configuration and other template aspects, let me give you the template where everything is already configured for work.
http://www.playuptools.com/downloads/extras/CleanTemplate.skp - just copy this file into the Google SketchUp 8\Resources\en-US\Templates directory and select the new template in the following window:
")
Now that's better.
")
Still, I'd like you to know how to configure the unit setup for yourself.
The tab you're looking for is situated in the Window -> Model Info window.
")
The settings above are recommended and already provided with the aforementioned template. These a good for a game-oriented model and ease the workflow a bit.
Please note that the "Precision" parameter is not defining the actual vertex coordinate precision, but rather the display of lengths in the bottom right corner of SU interface. 0.000m or further values will give you unnecessary visual clutter and aren't really useful in 99% cases since you have a 0.01m length snapping, so your tools will never produce irregular fractional values.
The 0.01m length snap itself is good because such value makes it easy to hand-draw the lengths like 1m, and also ensures that you won't use features smaller than 1cm (e.g. too thin metal plates).
Also, don't worry, using meters instead of centimeters as default unit does not affect the scale of the model. It's used to, again, speed your workflow up: meter-based values are utilized more often then centimeter-based ones in architecture modeling. Setting them as default unit means you won't need to type the unit name when working with the tools, e.g. typing "8" while drawing the edge will give you precisely 8m long edge. You can still use centimeters, e.g. type "37cm", but it's not that common value, and it's also faster to input it as "0.37".
That's it.
1.3. Materials
One of the most important aspects of modeling is working with materials. You will use the material window quite often, so let's add it to our workspace.
")
By default, the material window looks like this. But we'll need a little more complex layout with two windows: one for browsing/selecting materials, one for editing them.
Open the second window with the
 button.
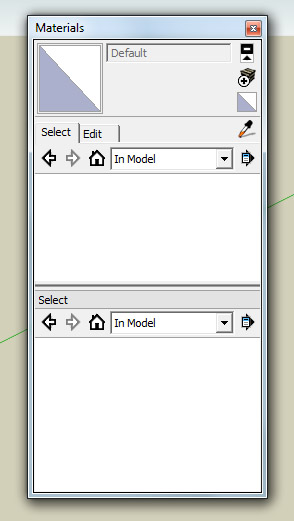
Now switch the click on the Edit tab above:
")
Make sure that the lower window is set to display the "In Model" folder, and we're ready to work with materials now. But there we have one more thing to talk about: material collections.
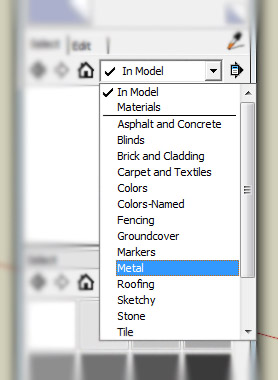
There are lots of categories, surface types, colors and so on. All of these are included in SketchUp setup by default.
")
Here's one thing about it: you won't ever need these for any game-targeted model. These textures are low-quality JPEG images primarily used for geolocated Google Earth modeling, and are not suiting for use in games. So switch the browser folder back to "In Model" and forget about them.

1.4. Render settings
Just a couple of handy settings to enhance your viewport look and ease your workflow. First, open up the Rendering tab in the Model Info window and enable anti-aliasing of textures.

Second, open up the OpenGL tab in the Preferences window and configure it as shown below:
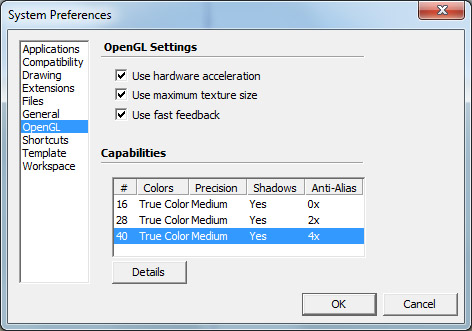
That's all we need to know about the workspace setup.